
👨💻作者简介: CSDN、阿里云人工智能领域博客专家,新星计划计算机视觉导师,百度飞桨PPDE,专注大数据与AI知识分享。
✨公众号:GoAI的学习小屋 ,免费分享书籍、简历、导图等,更有交流群分享宝藏资料,关注公众号回复“加群”或➡️点击链接 加群。
🎉专栏推荐: 点击访问➡️ 《计算机视觉》 总结目标检测、图像分类、分割OCR、等方向资料。 点击访问➡️ 《深入浅出OCR》: 对标全网最全OCR教程,含理论与实战总结,欢迎订阅。
【智慧交通项目实战】 OCR车牌检测与识别项目实战(二):车牌检测
💚导读:本项目为新系列【智慧交通项目实战】《OCR车牌检测和识别》(二)–基于YOLO的车牌检测,该系列将分为多篇文章展开分别对项目流程、数据集、检测、识别算法、可视化进行详细介绍。本篇为该系列第二篇,将着重介绍车牌检测流程,对环境安装、训练流程、配置进行详细解读,后续该系列文章将陆续更新。

本系列项目目录,后续将更新对应文章:
1.智慧交通预测系统(PaddleOCR版本)
2.OCR车牌检测+识别
本篇项目, 代码暂未公开,需要代码和指导可加群联系。
3.车辆检测
后续更新
一、项目背景:
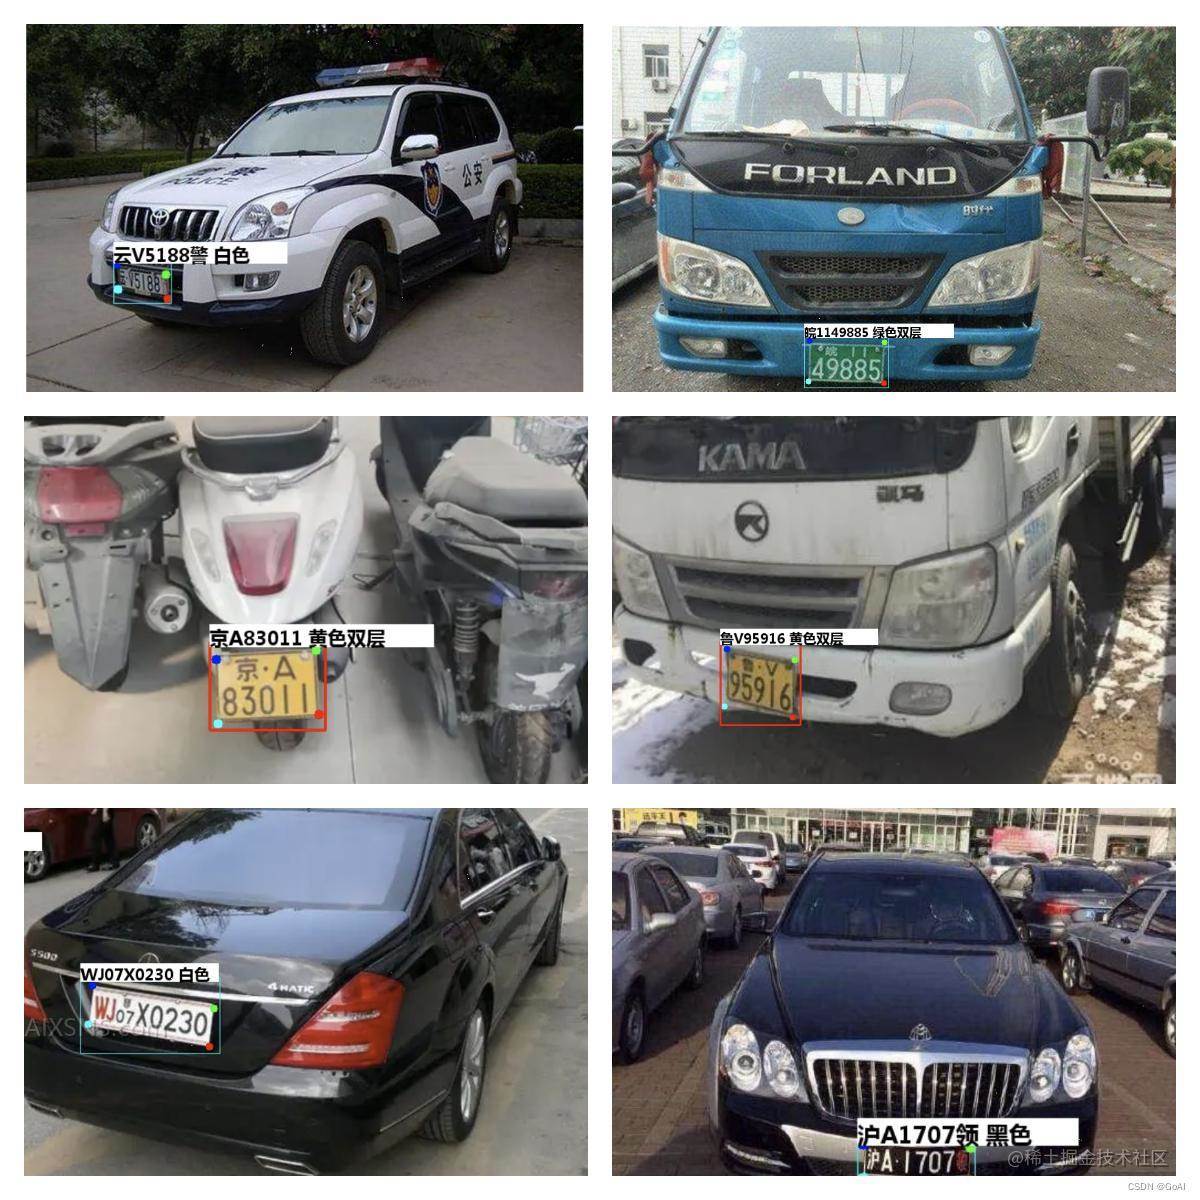
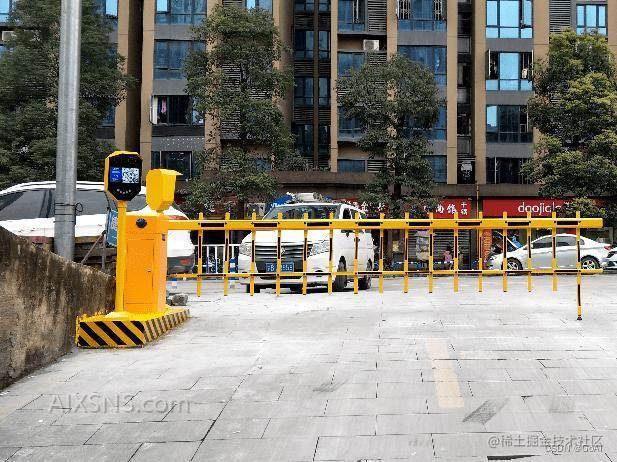
车牌识别技术是智能交通的重要环节,目前已广泛应用于例如停车场、收费站等等交通设施中,提供高效便捷的车辆认证的服务,其中较为典型的应用场景为卡口系统。车牌识别即识别车牌上的文字信息,属于光学字符识别(OCR)的一项子任务。

二、项目流程:
1.基于YOLOv5的车牌检测 (后续会更新Yolov7版本)
YOLOv5训练代码和测试代码(Pytorch)
- 整套YOLOv5项目工程,含训练代码train.py和测试代码demo.py
- 支持高精度版本yolov5s训练和测试
- 支持轻量化版本yolov5训练和测试
- 根据本篇博文说明,简单配置即可开始训练:train.py
- 源码包含了训练好的yolov5及其他模型,配置好环境,可直接运行demo.py
- 测试代码demo.py支持图片,视频和摄像头测试
2.基于CRNN和LPRNet的车牌识别
支持如下:
- 1.单行蓝牌
- 2.单行黄牌
- 3.新能源车牌
- 4.白色警用车牌
- 5.教练车牌
- 6.武警车牌
- 7.双层黄牌
- 8.双层白牌
- 9.使馆车牌
- 10.港澳粤Z牌
- 11.双层绿牌
- 12.民航车牌
三、项目文件目录
#注:代码过长只截取部分代码文件

----plate
    |----ccpd_process.py
    |----data
    |    |----argoverse_hd.yaml
    |    |----coco.yaml
    |    |----coco128.yaml
    |    |----hyp.finetune.yaml
    |    |----hyp.scratch.yaml
    |    |----plateAndCar.yaml
    |    |----retinaface2yolo.py
    |    |----train2yolo.py
    |    |----val2yolo.py
    |    |----val2yolo_for_test.py
    |    |----voc.yaml
    |    |----widerface.yaml
    |----demo.sh
    |----detect_demo.py
    |----detect_plate.py
    |----export.py
    |----fonts
    |    |----platech.ttf
    |----hubconf.py
    |----image
    |    |----README
    |    |    |----test_1.jpg
    |    |    |----weixian.png
    |----json2yolo.py
    |----LICENSE
    |----models
    |    |----blazeface.yaml
    |    |----blazeface_fpn.yaml
    |    |----common.py
    |    |----experimental.py
    |    |----yolo.py
    |    |----yolov5l.yaml
    |    |----yolov5l6.yaml
    |    |----yolov5m.yaml
    |    |----yolov5m6.yaml
    |    |----yolov5n-0.5.yaml
    |    |----yolov5n.yaml
    |    |----yolov5n6.yaml
    |    |----yolov5s.yaml
    |    |----yolov5s6.yaml
四、车牌检测实战
(1) 环境安装
1.Pytorch环境安装:
参考我的Pytorch专栏:PyTorch学习笔记(一):PyTorch环境安装
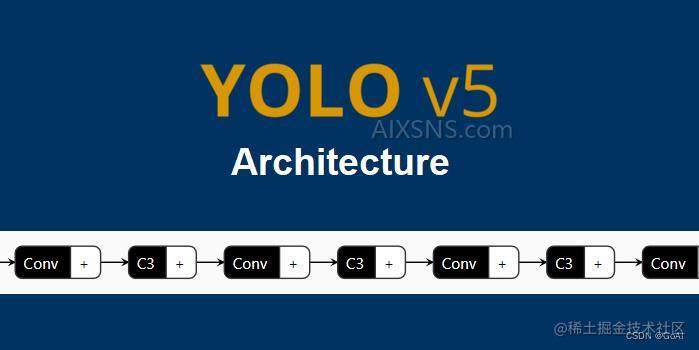
2.YOLOv5安装:
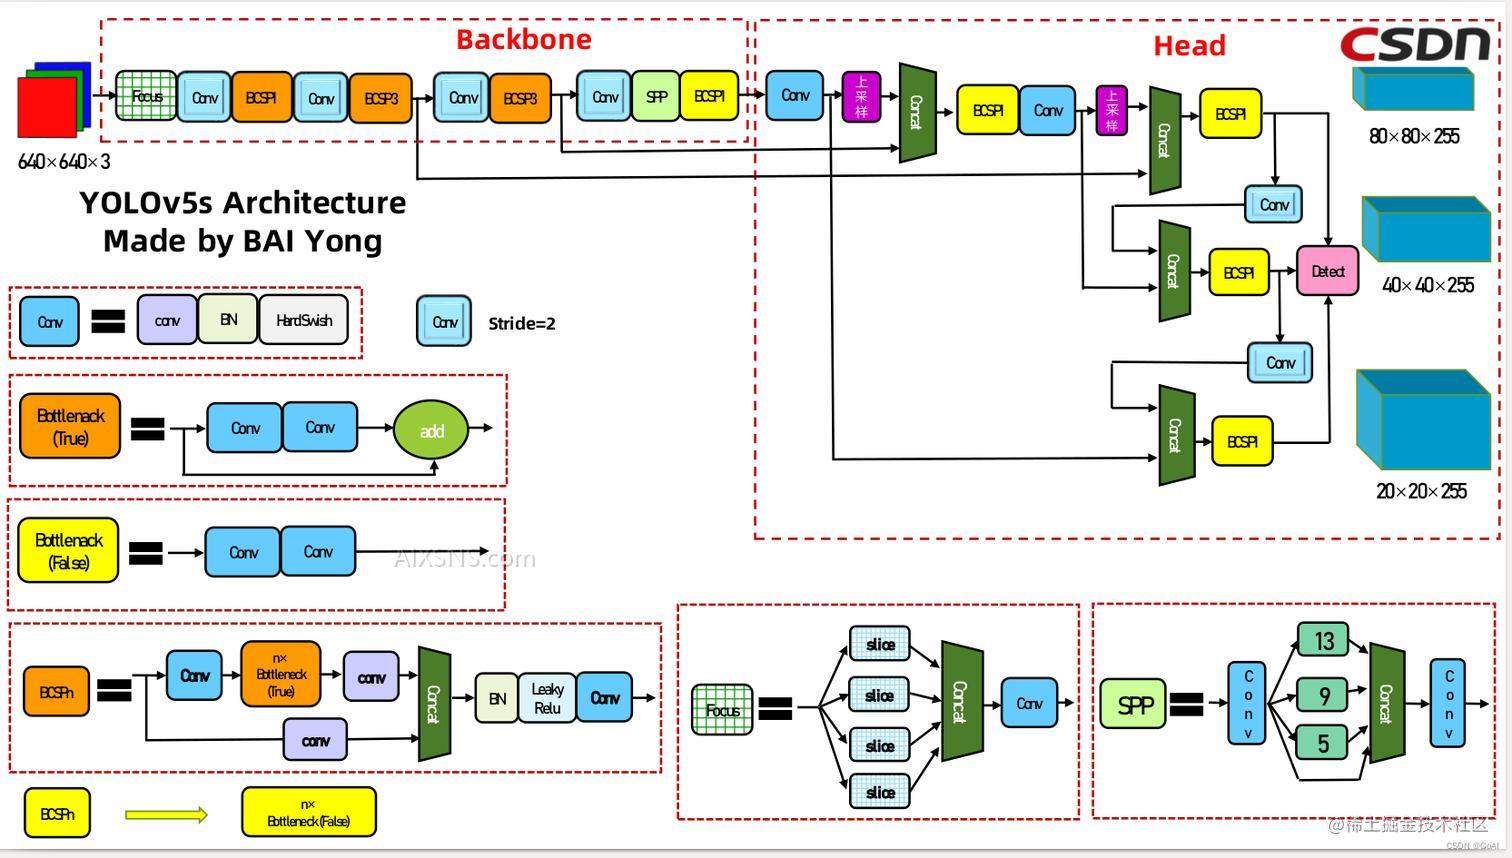
参考:YOLOv5: GitHub – ultralytics/yolov5: YOLOv5 🚀 in PyTorch > ONNX > CoreML > TFLite , 原始官方代码训练需要转换为YOLO的格式,不支持VOC的数据格式。
3.依赖安装
本项目Python依赖环境requirements配置文件如下:
asttokens
backcall
charset-normalizer
cycler
dataclasses
debugpy
decorator
executing
fonttools
idna
ipykernel
ipython
jedi
jupyter-client
jupyter-core
kiwisolver
matplotlib
matplotlib-inline
nest-asyncio
numpy
opencv-python
packaging
pandas
parso
pickleshare
Pillow
prompt-toolkit
psutil
pure-eval
Pygments
pyparsing
python-dateutil
pytz
PyYAML
pyzmq
requests
scipy
seaborn
six
stack-data
thop
tornado
tqdm
traitlets
typing-extensions
urllib3
wcwidth
项目参考硬件环境:
| 内容 | 型号 |
|---|---|
| CPU | I7-8750 2.20GHz |
| GPU | GTX 2080ti |
| Python | 3.7.8 |
| Pytorch | 1.13.0 |
| Opencv | 4.3.0 |
| CUDA | 11.1 |
| 编码环境 | Pycharm |
| 操作系统 | Ubuntu 20.04 |
(2)下载数据集及准备:
车牌检测下载链接:CCPD车牌检测数据集 提取码:pi6c 。
注:上述数据由CCPD和CRPD数据集选取并转换,关于CCPD车牌数据集具体介绍见本系列上一篇【智慧交通项目实战】《OCR车牌检测与识别》(一)。
在使用YOLO算法进行车牌检测训练时首先需要将准备的标注完成的数据集转换为YOLO格式,具体格式为:
label x y w h pt1x pt1y pt2x pt2y pt3x pt3y pt4x pt4y
注:坐标顺序为左上,右上,右下,左下 ,且是经过归一化,其中x,y是中心点除以图片宽高,w,h是框的宽高除以图片宽高,ptx,pty是关键点坐标除以宽高。Label代表车牌类型,label为0表示该车牌为单层车牌,label为1表示该车牌为双层车牌。
部分格式转换代码如下:
def xywh2yolo(rect,landmarks_sort,img):
    h,w,c =img.shape
    rect[0] = max(0, rect[0])
    rect[1] = max(0, rect[1])
    rect[2] = min(w - 1, rect[2]-rect[0])
    rect[3] = min(h - 1, rect[3]-rect[1])
    annotation = np.zeros((1, 12))
    annotation[0, 0] = (rect[0] + rect[2] / 2) / w  # cx
    annotation[0, 1] = (rect[1] + rect[3] / 2) / h  # cy
    annotation[0, 2] = rect[2] / w  # w
    annotation[0, 3] = rect[3] / h  # h

    annotation[0, 4] = landmarks_sort[0][0] / w  # l0_x
    annotation[0, 5] = landmarks_sort[0][1] / h  # l0_y
    annotation[0, 6] = landmarks_sort[1][0] / w  # l1_x
    annotation[0, 7] = landmarks_sort[1][1] / h  # l1_y
    annotation[0, 8] = landmarks_sort[2][0] / w  # l2_x
    annotation[0, 9] = landmarks_sort[2][1] / h # l2_y
    annotation[0, 10] = landmarks_sort[3][0] / w  # l3_x
    annotation[0, 11] = landmarks_sort[3][1] / h  # l3_y
    # annotation[0, 12] = (landmarks_sort[0][0]+landmarks_sort[1][0])/2 / w  # l4_x
    # annotation[0, 13] = (landmarks_sort[0][1]+landmarks_sort[1][1])/2 / h  # l4_y
    return annotation
经过上述格式转换完成后,数据集格式如图所示,转换完成后即可开始训练。

(3)配置数据文件
修改 data/widerface.yaml train和val路径,换成你的数据路径
train: /your/train/path #修改成你的路径
val: /your/val/path     #修改成你的路径
# number of classes
nc: 2                 #这里用的是2分类,0 单层车牌 1 双层车牌

# class names
names: [ 'single','double']
(4)关键点定位
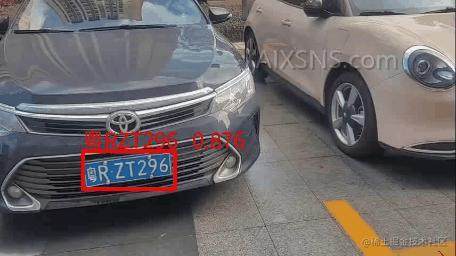
Yolo系列是目标检测经典算法,本项目采用修改后的yolov5系列进行训练,车牌检测效果如下:
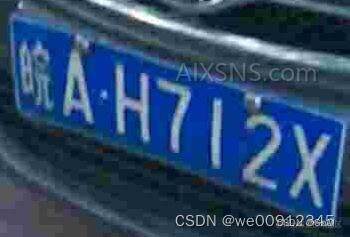
从上图可以看出,原始模型检测后的图片存在倾斜角度、且存在干扰信息过多,使用该图片进行车牌识别,容易导致识别效果不好甚至是误识别。因此,通过关键点识别可以很好解决上述问题,假设我们得到车牌的四个角点坐标、通过透视变换即可得到下图:
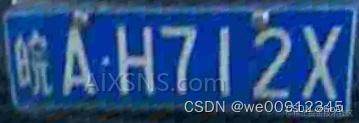
上图则非常适合车牌识别算法的数据集要求。因此,本项目采用在检测的同时,通过透视变化对车牌关键点定位。
透视变换代码:
def four_point_transform(image, pts):
    # obtain a consistent order of the points and unpack them
    # individually
    rect = order_points(pts)
    (tl, tr, br, bl) = rect

    widthA = np.sqrt(((br[0] - bl[0]) ** 2) + ((br[1] - bl[1]) ** 2))
    widthB = np.sqrt(((tr[0] - tl[0]) ** 2) + ((tr[1] - tl[1]) ** 2))
    maxWidth = max(int(widthA), int(widthB))

    heightA = np.sqrt(((tr[0] - br[0]) ** 2) + ((tr[1] - br[1]) ** 2))
    heightB = np.sqrt(((tl[0] - bl[0]) ** 2) + ((tl[1] - bl[1]) ** 2))
    maxHeight = max(int(heightA), int(heightB))
    dst = np.array([
        [0, 0],
        [maxWidth - 1, 0],
        [maxWidth - 1, maxHeight - 1],
        [0, maxHeight - 1]], dtype = "float32")

    # compute the perspective transform matrix and then apply it
    M = cv2.getPerspectiveTransform(rect, dst)
    warped = cv2.warpPerspective(image, M, (maxWidth, maxHeight))

    # return the warped image
    return warped
(5)车牌检测训练
python3 train.py --data data/widerface.yaml --cfg models/yolov5n-0.5.yaml --weights weights/plate_detect.pt --epoch 250
参数说明:
本项目大部分参数采用官方预设参数,模型训练的超参数如下表所示。在模型选择方面选用yolov5n,s,m以及改进模型,共迭代250epoch;批量大小batchsize=96。输入网络图片大小设置为640×640,优方器方为0.937动量,学习率为0.01的随机梯度下降(SGD)优化器,权重衰减系数为0.0005,训练与测试过程中开启自适应anchor计算,IOU阈值设置为0.2,最终结果存在run文件夹中。
| 超参数名称 | 数值 |
|---|---|
| 模型 | Yolov5-n,s,m |
| 迭代轮数 | 250 |
| 批量大小 | 96 |
| 输入图片大小 | 640 |
| 是否继续训练 | False |
| 优化器 | SGD |
| 学习率 | 0.01 |
| 动量 | 0.937 |
| 优化器权重衰减 | 0.0005 |
| 训练/测试IOU阈值 | 0.2 |
| 是否自适应anchor | True |
检测模型 onnx export
本项目支持检测模型导出onnx,前提需要安装onnx-sim onnx-simplifier
- python export.py --weights ./weights/plate_detect.pt --img 640 --batch 1
 - onnxsim weights/plate_detect.onnx weights/plate_detect.onnx
训练好的模型进行检测
加载训练好的车牌模型即可对车牌图片进行检测,执行以下命令即可:
python detect_demo.py --detect_model weights/plate_detect.pt
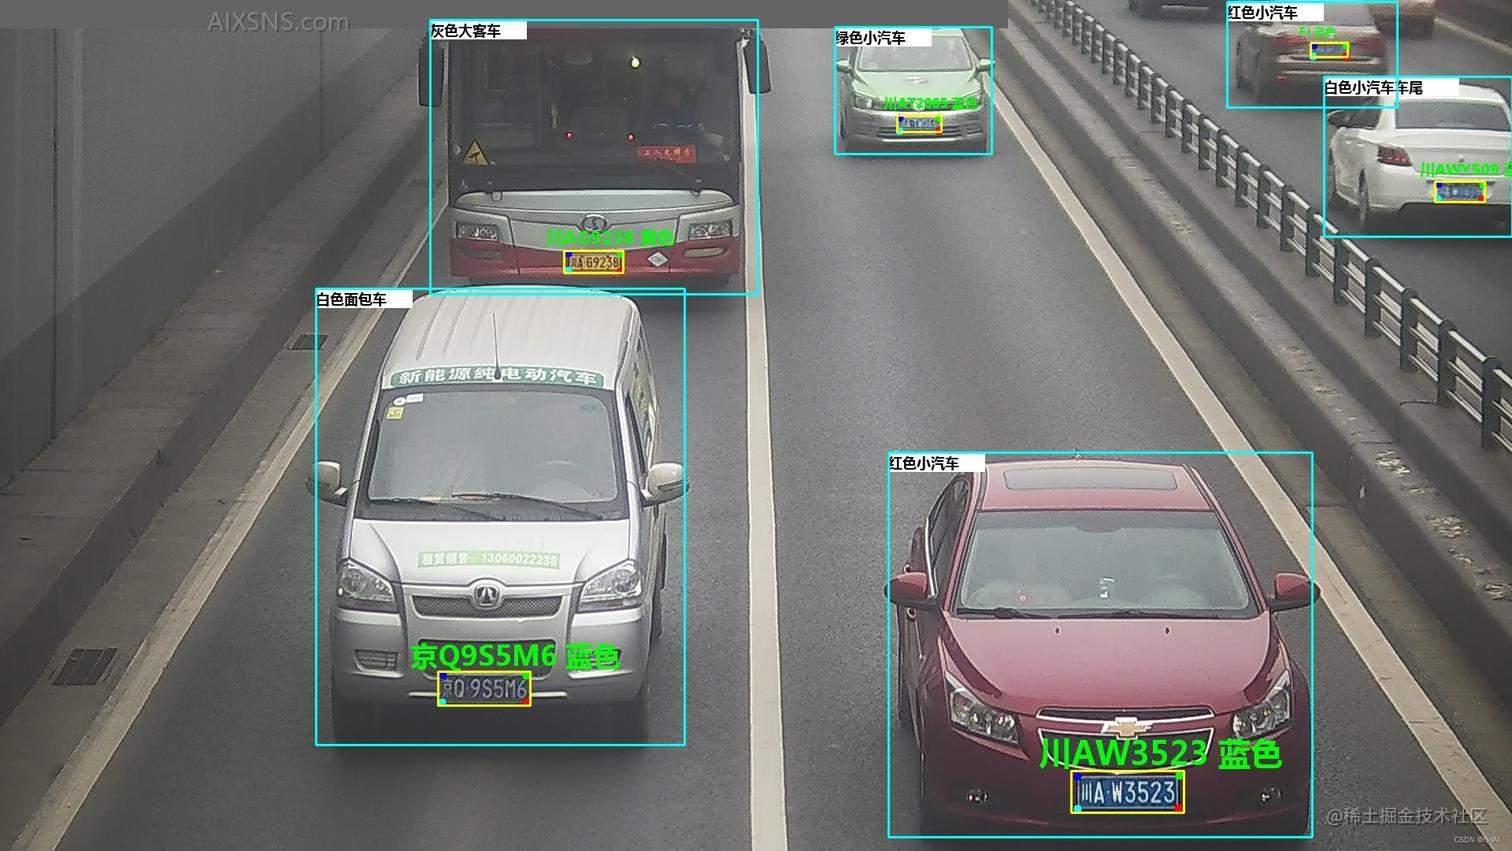
五、项目最终识别效果:
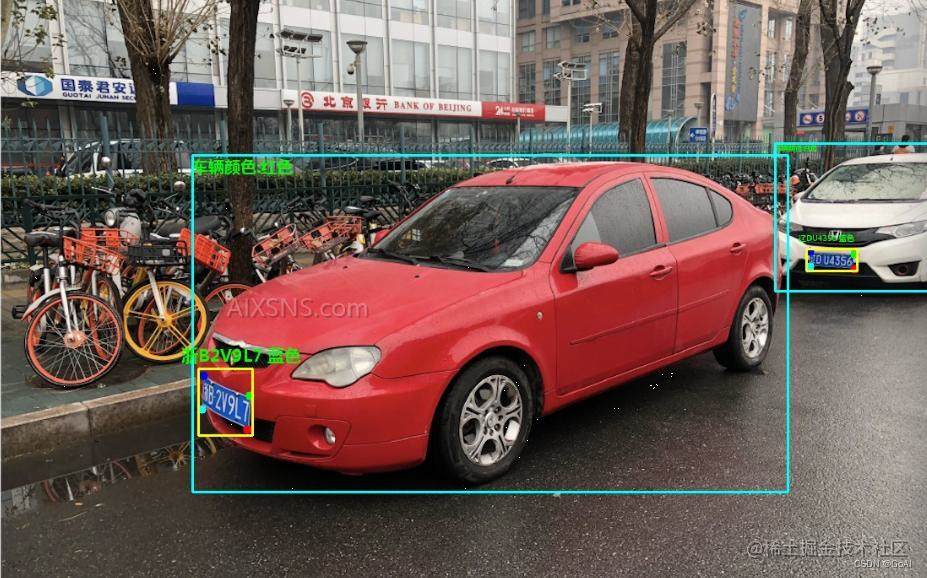
最近比较忙,剩余项目介绍后续会继续补充!!
文章参考 :
aistudio.baidu.com/aistudio/pr…

