携手创作,共同成长!这是我参与「掘金日新计划 · 8 月更文挑战」的第20天,上一篇文章中,我们介绍了Tensor的张量裁剪、索引与数据筛选、组合与拼接、切片
今天,我们来介绍tensor的变形、填充&傅里叶变换、pytorch的简单编程技巧,模型的保存/加载,并行化、分布式、Tensor on GPU、Tensor的相关配置、Tensor与numpy的相互转换
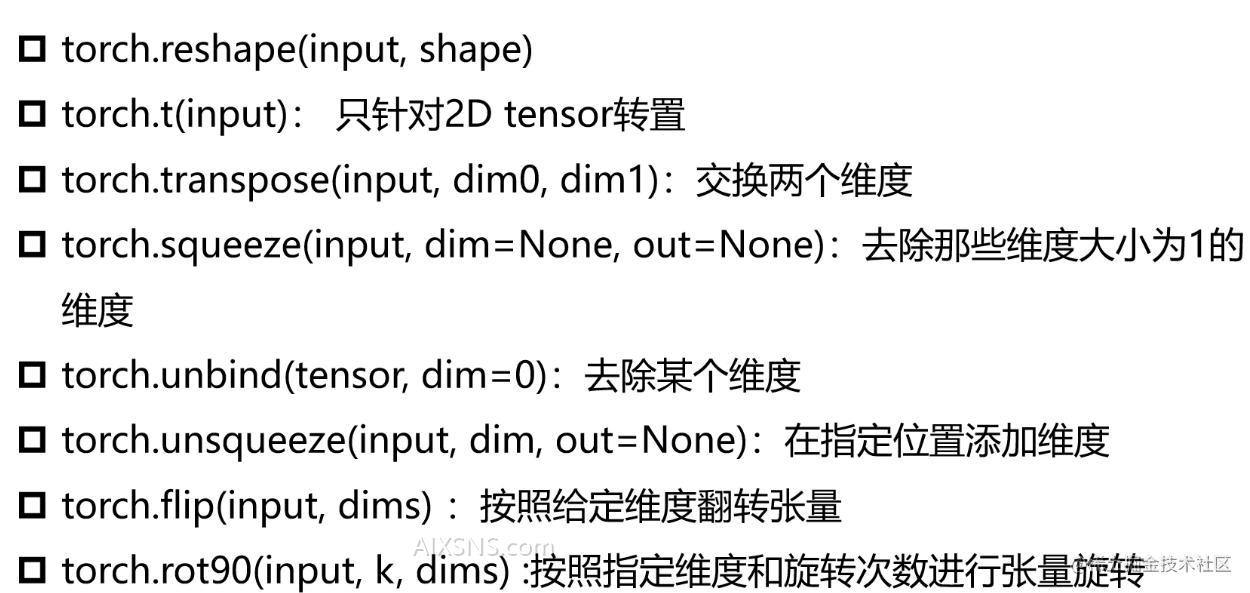
5.5Tensor的变形操作color{#135ce0}{5.5 Tensor的变形操作}
-
5.5.1 reshape
a = torch.rand(2, 3)

print(a)
out = torch.reshape(a, (3, 2))

print(out)
运行结果:
tensor([[0.9006, 0.8852, 0.0825],
        [0.2824, 0.4937, 0.2282]])
tensor([[0.9006, 0.8852],
        [0.0825, 0.2824],
        [0.4937, 0.2282]])
-
5.5.2 t转置
print(torch.t(out))
运行结果:
tensor([[0.9006, 0.0825, 0.4937],
        [0.8852, 0.2824, 0.2282]])
-
5.5.3 transpose维度交换
a = torch.rand(1, 2, 3)
out = torch.transpose(a, 0, 1)
print(out)
print(out.shape)
运行结果:
tensor([[[0.0769, 0.2295, 0.0159]],

        [[0.1029, 0.4743, 0.7617]]])
torch.Size([2, 1, 3])
-
5.5.4 squeeze
out = torch.squeeze(a)
print(out)
print(out.shape)
运行结果:
tensor([[0.0769, 0.2295, 0.0159],
        [0.1029, 0.4743, 0.7617]])
torch.Size([2, 3])
-
5.5.5 unsqueeze
out = torch.unsqueeze(a, -1)
print(out.shape)
-1就是在最后一个维度上进行扩展
运行结果:
torch.Size([1, 2, 3, 1])
-
5.5.6 unbind
out = torch.unbind(a, dim=1)

print(out)
运行结果:
(tensor([[0.0769, 0.2295, 0.0159]]), tensor([[0.1029, 0.4743, 0.7617]]))
-
5.5.7 filp
print(a)
print(torch.flip(a, dims=[2, 1]))
先对第二个维度进行filp,再对第一个维度进行filp
运行结果:
tensor([[[0.0769, 0.2295, 0.0159],
         [0.1029, 0.4743, 0.7617]]])
tensor([[[0.7617, 0.4743, 0.1029],
         [0.0159, 0.2295, 0.0769]]])
-
5.5.8 rot90
旋转90度,默认是逆时针旋转
print(a)
out = torch.rot90(a)
print(out)
print(out.shape)
运行结果:
tensor([[[0.0769, 0.2295, 0.0159],
         [0.1029, 0.4743, 0.7617]]])
tensor([[[0.1029, 0.4743, 0.7617]],

        [[0.0769, 0.2295, 0.0159]]])
torch.Size([2, 1, 3])
5.6Tensor的填充操作、频谱操作color{#135ce0}{5.6 Tensor的填充操作、频谱操作}
-
5.6.1 填充操作
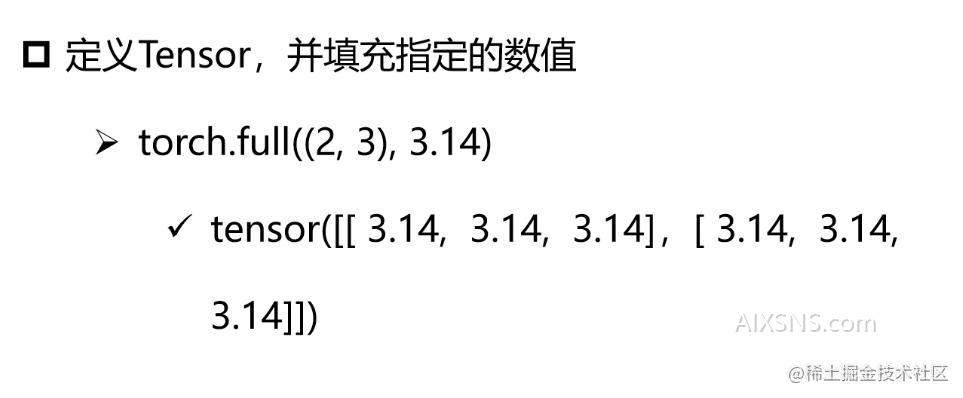
填充也是我们在进行网络设计经常用到的方式,尤其是在定义中间变量的时候经常会采用这种方式。
a = torch.full((2,3), 10)
print(a)
运行结果:
tensor([[10, 10, 10],
        [10, 10, 10]])
-
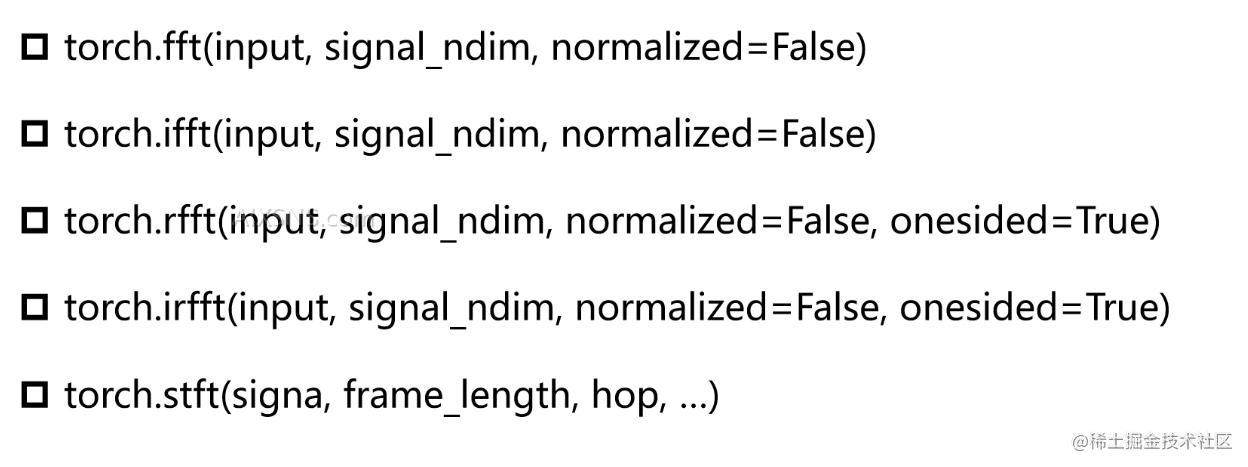
5.6.2 频谱操作
频谱操作在解决计算机视觉的时候是用不到的,主要用在云信号的解析,将时域变化的信号转化到频域的时候,会用到频谱分析的操作
利用这些这几个函数可以完成对云信号的转换以及相关的频谱分析
5.7Pytorch简单的编程技巧color{#135ce0}{5.7 Pytorch简单的编程技巧}
-
5.7.1 模型保存/加载
-
torch.saves(state, dir)保存/序列化
-
torch.load(dir) 加载模型
这是我们在进行深度学习模型搭建的时候经常会用到的方法,我们需要保存模型训练的参数,也就是当前图的状态,然后利用我们训练出来的参数进行后续的逻辑运算,也就是推理(inference)的过程。
-
5.7.2 并行化
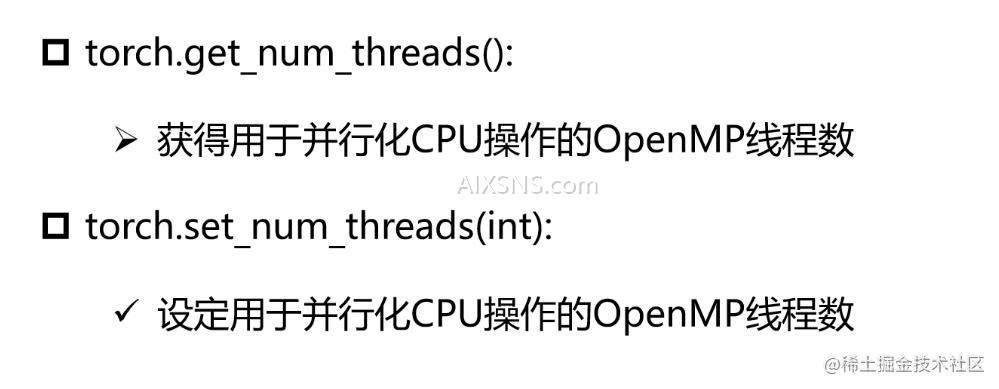
-
5.7.2 分布式

-
5.7.3 Tensor on GPU
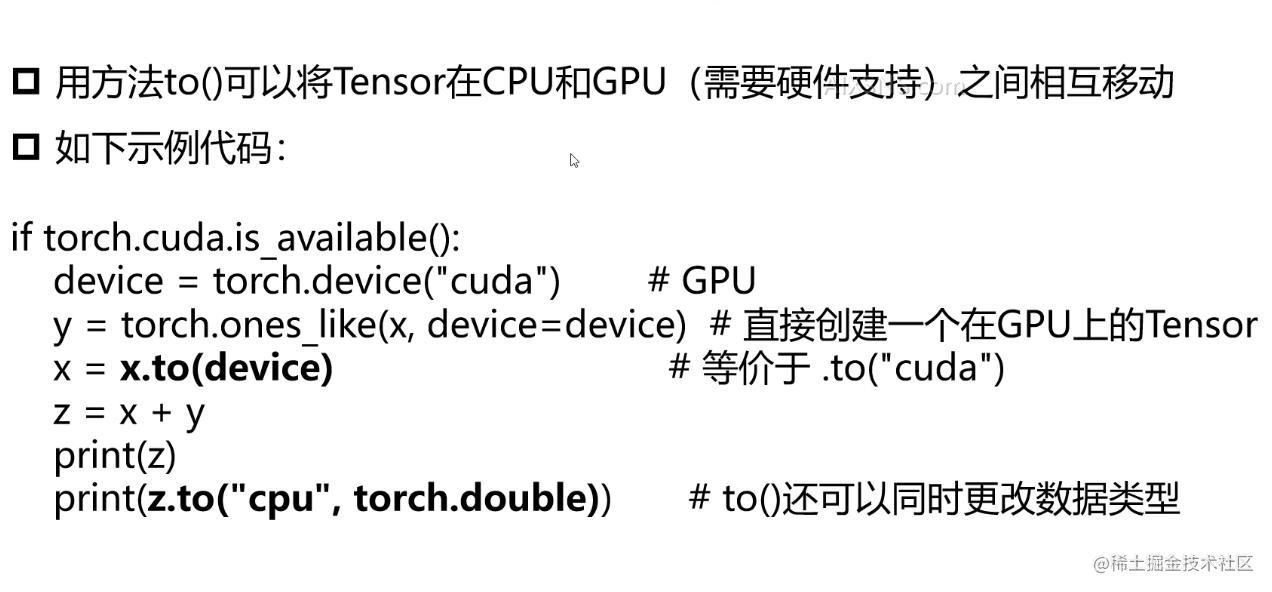
一般情况下,在进行数据处理的时候会放在CPU上,在进行模型训练的时候会放在GPU上
-
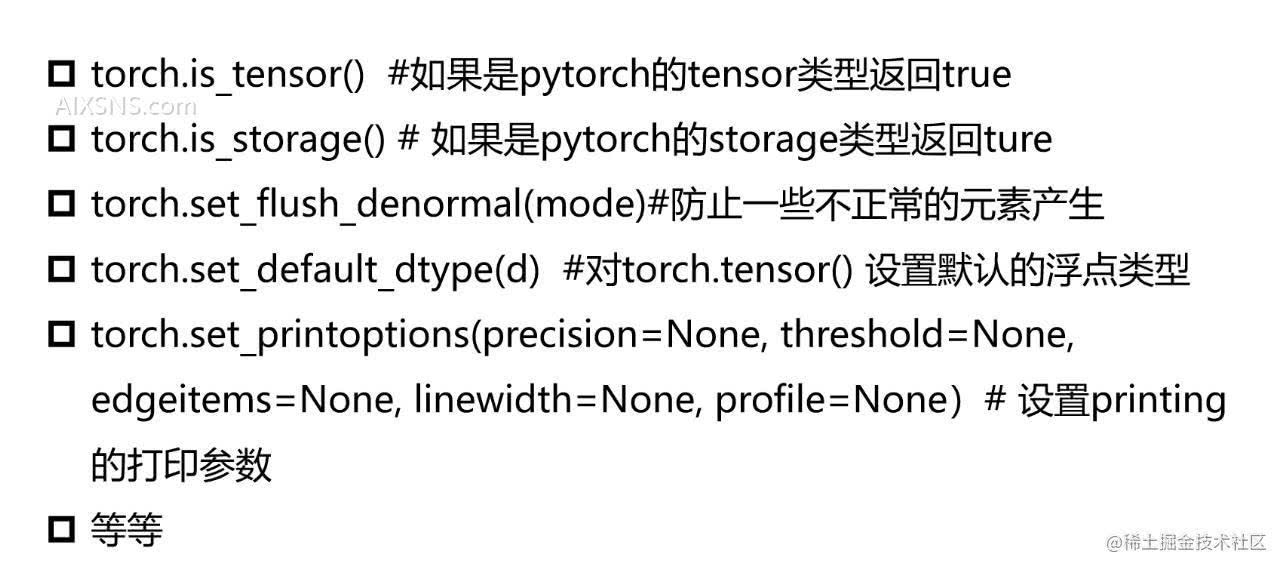
5.7.4 Tensor的相关配置
-
5.7.5 Tensor与numpy的相互转换
-
torch.from_numpy(ndarry) 利用一个numpy的数据对pytorch中的一个Tensor进行初始化
-
a.numpy 将tensor转换成numpy的变化
代码实现
a = np.zeros([2, 2])
out = torch.from_numpy(a)
print(out)
运行结果:
tensor([[0., 0.],
        [0., 0.]], dtype=torch.float64)
在深度学习中,比较常见的就是读取一张图片,然后将它转换成一个张量,在进行后续的一个推理
代码实现:
在打印图片的时候加上cv2.waitKey(0),对话框才会被弹出来
data = cv2.imread("test.png")

print(data)
cv2.imshow("test1", data)
cv2.waitKey(0)
运行结果

利用之前介绍的slip函数对图片进行翻转:
out = torch.from_numpy(data)
out = torch.flip(out, dims=[0])
data = out.numpy()
cv2.imshow("test2", data)
cv2.waitKey(0)

把图片处理的放到GPU上来进行运算,对于GPU上的数据是没有办法直接获取转换成numpy格式的数据的,所以还得转换回来
out = torch.from_numpy(data)

out = out.to(torch.device("cuda"))
print(out.is_cuda)

out = torch.flip(out, dims=[0])

out = out.to(torch.device("cpu"))
print(out.is_cuda)

data = out.numpy()
cv2.imshow("test2", data)
cv2.waitKey(0)